Placeholder:
This is my initial planning and research for my Project Management Tool.
For the PMT tool, I want to make sure I create something that is both usable and relevant for not only myself but for other artists.
When thinking of the PMT tool, the one thing I can think of currently that would personally benefit me is a tool that will handle the organization of my Houdini to HDA to Unreal engine workflow. Keeping my HDA's organize based on project, in one directory, while keeping the subsequent UE4 project in the same place would be quite nice but also prove very useful when working on digital assets because it would allow me to test them in One single project.
So my PMT tool planning is as follows:
I want to be able to switch between Houdini and Engine versions by setting them up to a 'project' in Setup. This will allow me to have different levels of Houdini/Engine.
I also want visual feedback to make sure I have the correct project selected and the correct project files are visible. I want to be able to browse through this and possibly select a certain file I would like to work on.
I would like to be able to load Houdini(DCC1) and possible load any DCC tools(additional tools to help).
I would also like to be able to load the Engine. From there, I would like to be able to simply click the import button to load the 'Testing' and 'HDA' branch, which is Houdini DA files copied over (HDA).
This is a LOT to ask for but I have firm confidence that I can create this tool and bake it all into a single binary installer like I did for my Texture Tool.
BONUS: For DCC tools button, I would like to be able to load my Texture Tool as a bonus to my texture management tool. Perhaps this could be a 'ENGINE Tool' button next to Engine, but given my time constraint, I really do want to implement my previous tool into this one as a learning experience.
FIEA ART BLOG
Wednesday, May 15, 2019
Thursday, April 18, 2019
Bust Texture Pass
Finally got a chance to do a little texturing. Did a pass, skin is super difficult to do correctly...
I did 2 renders in Iray, one focusing on the texturing, and one with the specularity blown up to give it a resin look, as with the reference.
Next up, get it in Engine! Hopefully I'll find some time to spare in the coming few weeks before industry reviews.
Edit: I noticed the glossy render had some artifacting in the neck area due to the rendering. So I went and did a more refined edit. This one combines both into a more finalized approach.
Slimy little Alien boy.
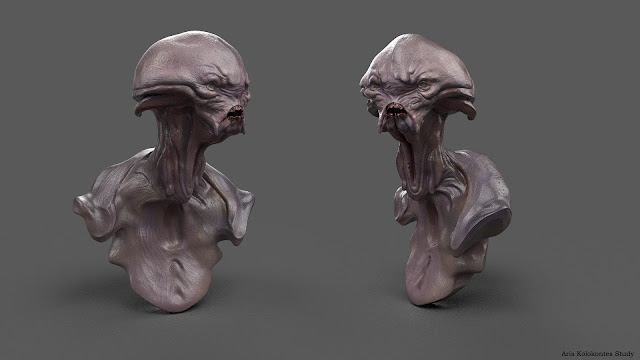
Update: Heads successfully in Engine with minor hitches. Texture's are not working correctly due to incorrect scaling :( My mistake, an oversight, I thought I had the size sorted out in the FBX export but I didn't.
And it's in Engine, fixed with decent detail! Just need to make some lighting/scene changes and maybe some in engine material tweaks to get the full effect!
I did 2 renders in Iray, one focusing on the texturing, and one with the specularity blown up to give it a resin look, as with the reference.
Next up, get it in Engine! Hopefully I'll find some time to spare in the coming few weeks before industry reviews.
Slimy little Alien boy.

Update: Heads successfully in Engine with minor hitches. Texture's are not working correctly due to incorrect scaling :( My mistake, an oversight, I thought I had the size sorted out in the FBX export but I didn't.
And it's in Engine, fixed with decent detail! Just need to make some lighting/scene changes and maybe some in engine material tweaks to get the full effect!
Monday, March 18, 2019
Bust HighRes
I finally have some time to work on the 3D bust,
Update 1: 3/18
I went ahead and made some changes to the sculpt. Working on slowly pushing and pulling the folds and shapes. Trying to maintain some degree of accuracy but mostly just working from large to small in Dynamesh.
Currently only got one side of the face done. Adding the ear flaps/sculpting the eyes/mouth without symmetry was a pain but manageable.
So I just got to do the right side of the face, the right eye. Then the mouth, followed by the nasal bridge area. This will then lead to the turkey neck. I will also have to re-emphasize the folds, as they are quite loose in the original sculpt.
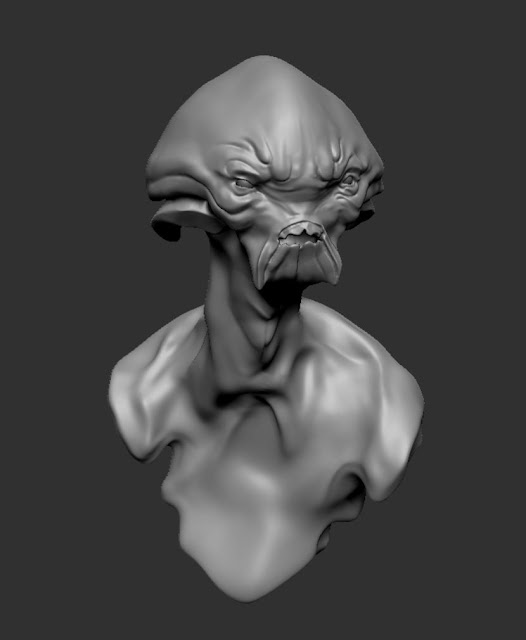
Update: 3/20
Continuing to build out the sculpt, I am continually making changes to the form because I'm noticing small things that need to be tweaked or edited as I go. I need to inflate the brow a bit and tuck some of the cheek muscles back a bit more towards the ear (which also needs to be pushed back and made smaller). I will most likely move the mouth and brow forward slightly to compensate.
The neck is what I'm currently working on as well as the general body. These will take the least amount of time as most has been and will be invested in the face.
Update 3/21
Cleaned up a lot of the issues that I found earlier and started moving onto sculpting out detail.
3/25
Continued to finalize the High res sculpt, here are a few shots of the sculpt and overall detail. I wasn't able to do the lower body due to time constraint but this is something I could always go back to and keep working in more detail.
3/26
This morning I quickly did the low poly inside of Zbrush, using polypaint/weights (to create a basic topo) as well as a 'bear-rug' unwrap using UV master. I really only had about an hour to do this because I wanted to get it into Substance and bake it before class.
It's at 25k. I did some tests and managed to get it to around 10k-3k but I was starting to lose too much details even with polyweights.
Here are some renders from inside substance.
-placeholder
Update 1: 3/18
I went ahead and made some changes to the sculpt. Working on slowly pushing and pulling the folds and shapes. Trying to maintain some degree of accuracy but mostly just working from large to small in Dynamesh.
Currently only got one side of the face done. Adding the ear flaps/sculpting the eyes/mouth without symmetry was a pain but manageable.
So I just got to do the right side of the face, the right eye. Then the mouth, followed by the nasal bridge area. This will then lead to the turkey neck. I will also have to re-emphasize the folds, as they are quite loose in the original sculpt.

Update: 3/20
Continuing to build out the sculpt, I am continually making changes to the form because I'm noticing small things that need to be tweaked or edited as I go. I need to inflate the brow a bit and tuck some of the cheek muscles back a bit more towards the ear (which also needs to be pushed back and made smaller). I will most likely move the mouth and brow forward slightly to compensate.
The neck is what I'm currently working on as well as the general body. These will take the least amount of time as most has been and will be invested in the face.
Update 3/21
Cleaned up a lot of the issues that I found earlier and started moving onto sculpting out detail.
Continued to finalize the High res sculpt, here are a few shots of the sculpt and overall detail. I wasn't able to do the lower body due to time constraint but this is something I could always go back to and keep working in more detail.
3/26
This morning I quickly did the low poly inside of Zbrush, using polypaint/weights (to create a basic topo) as well as a 'bear-rug' unwrap using UV master. I really only had about an hour to do this because I wanted to get it into Substance and bake it before class.
It's at 25k. I did some tests and managed to get it to around 10k-3k but I was starting to lose too much details even with polyweights.
Here are some renders from inside substance.
-placeholder
Tuesday, February 26, 2019
Friday, December 7, 2018
Cthulhu Final
It's been quite a journey for our 2D project.
This final week was spent cleaning up and organizing the presentation.
Unfortunately, we ran into a huge amount of issues with Perforce and version control. In our last few hours of working on the project, our file unfortunately got updated from 4.20.3 UE4 to 4.21 and this led to our entire map disappearing along with hours of work. We had to revert to a previous version but this ultimately led to our work being lost.
The particle effects in their current state still absolutely kill the FPS. There has been no way to really cut back on them, therefore our FPS will be rather abysmal in the coming presentation.
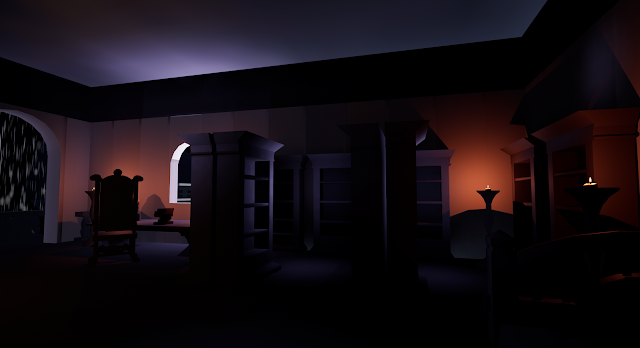
The good part is, we have a working iteration (luckily) for the presentation.
This final week was spent cleaning up and organizing the presentation.
Unfortunately, we ran into a huge amount of issues with Perforce and version control. In our last few hours of working on the project, our file unfortunately got updated from 4.20.3 UE4 to 4.21 and this led to our entire map disappearing along with hours of work. We had to revert to a previous version but this ultimately led to our work being lost.
The particle effects in their current state still absolutely kill the FPS. There has been no way to really cut back on them, therefore our FPS will be rather abysmal in the coming presentation.

The good part is, we have a working iteration (luckily) for the presentation.
Monday, December 3, 2018
Cthulhu Week 5
This week I worked on our Unreal level.
I created a variety of 'houses' to add more depth to the level.
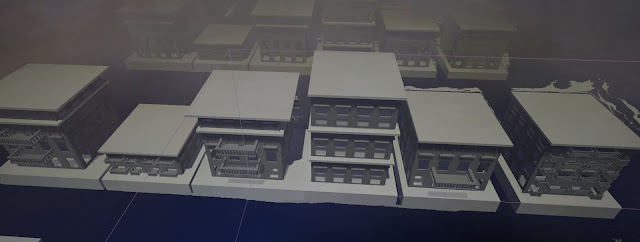
I created a variety of 'houses' to add more depth to the level.

Tech Art Project
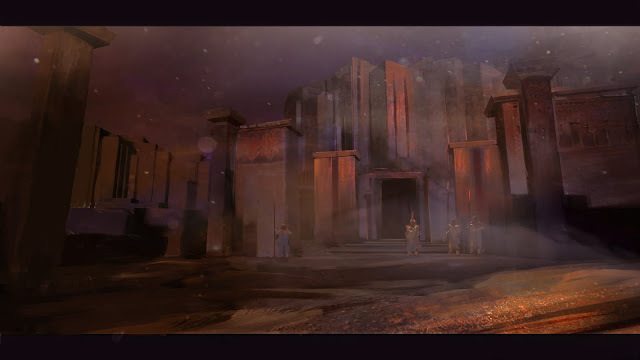
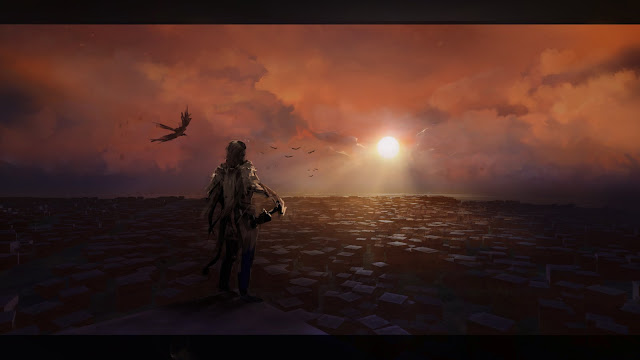
For my Tech Art Project, Chris challenged me to do something with 'Carthage'. I decided it would be interesting to create a set of concepts based on an existing IP, such as Vin Hill did for Assassin's Creed in a feudal japan setting.
His work can be found here: https://www.artstation.com/artwork/8oDJG
I wanted to create my own set of concepts in the style of: Assassin's Creed: Carthage, drawing inspiration from their recent publication, Odyssey.
I also wanted to explore the use of 'tools' that would allow me to quickly mock up a concept in 3D that I could then take into Photoshop and finalize. This is mostly to speed up my workflow and improve the quality of the work that is produced.
I will be spending a little less than a month on this project, with 3 weeks focused on learning/creating some tools while the final week will be used to create the concepts.
Phase 1: Research and Development
Using Houdini, I created a variety of Procedural tools that would allow me as an artist to quickly mock up a level.
My PillarCreator allows me to manipulate geometry to form a Pillar (It can also be adapted to form posts, lamps, and so forth). Using a curve, I can define where the pillars should form and through a resample, I can dictate how many pillars to form between point a and b (This essentially acts as a %).
PillarCreator from Rene Bencik on Vimeo.
Terrain:
This is a simple terrain digital asset that allows me to manipulate how rough/soft the terrain is and allows me some iteration through 'offset'.
Simple procedural terrain from Rene Bencik on Vimeo.
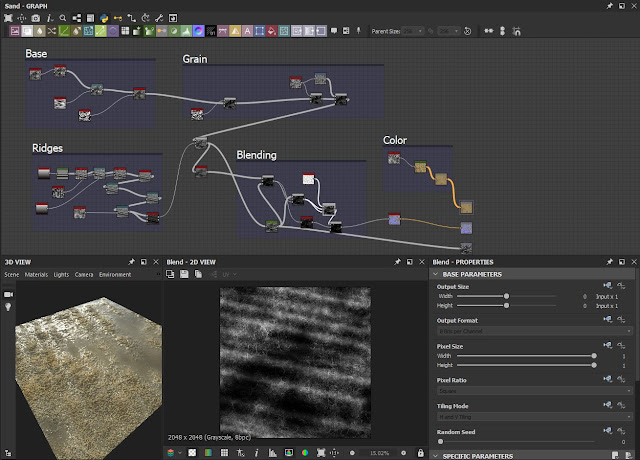
This is the first 'sand' material (and general material) I created in Substance designer. The goal of this was to figure out general substance structure and formatting, how the nodes work, how to create certain elements that create a greater whole.
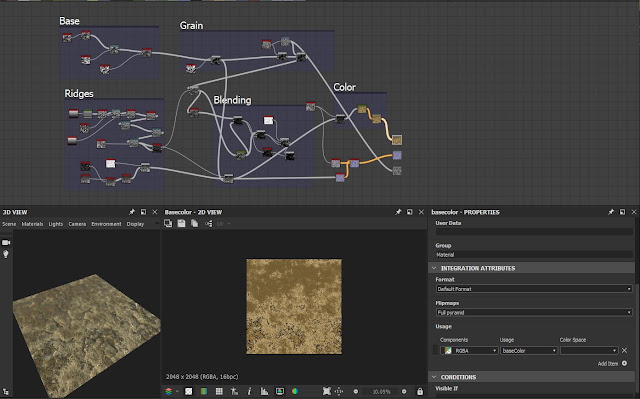
This is a more refined version of my material after doing some more research and learning. I still feel like I would have to commit more time to this to really get more in depth and understand the process better.
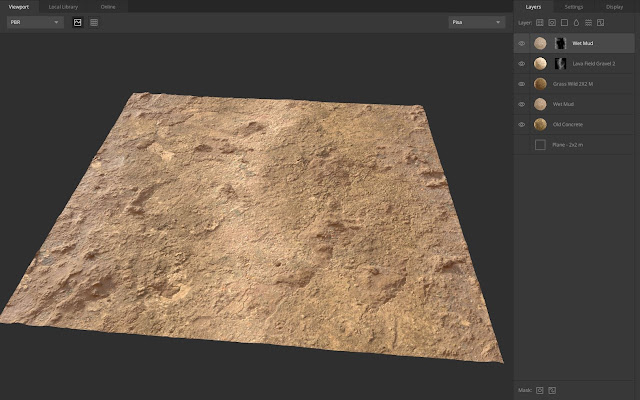
I also decided to look more into Quixel Mixer to create a material for the sand since I was not completely confident in my substance designer abilities. The results were much better and much easier to attain as Quixel is more geared towards artists. I plan to buy a license in the winter break and work on learning the program.
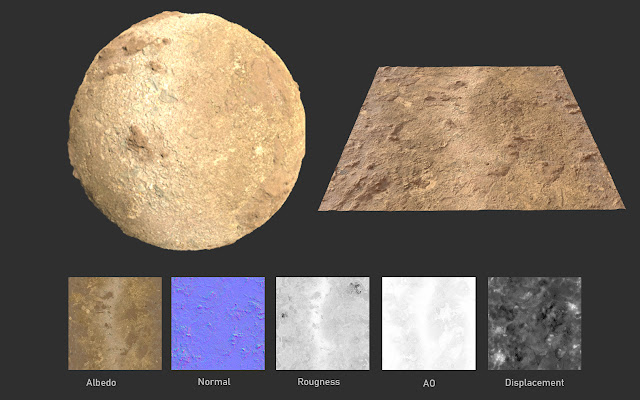
I applied the material I created to the landscape I generated from my digital asset. to get a base. Unfortunately, I haven't quite figured out how to get the level of detail I want but it's a good base for now. This is something I would have to explore further over break (I plan to learn Quixel Suite 2.0).
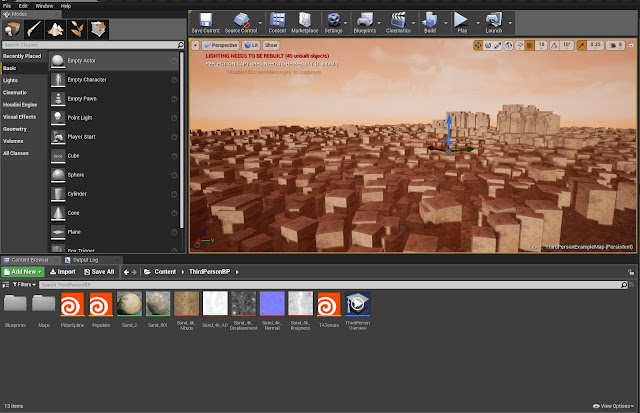
I combined all of the elements inside of Unreal and built up the scene, using the digital assets as seen below:
Part 2: Shots
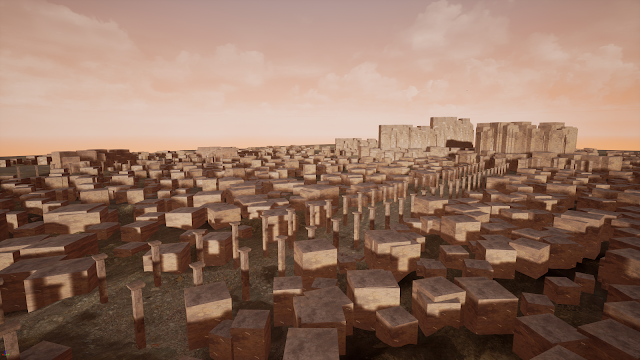
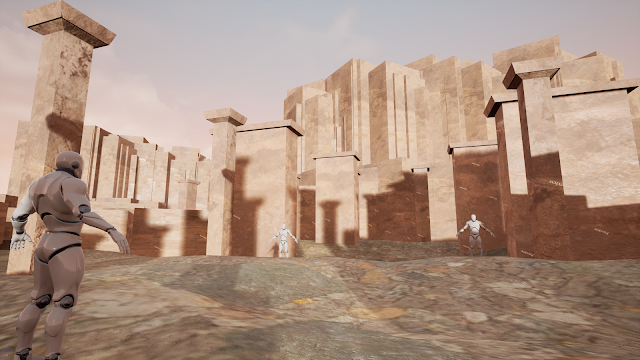
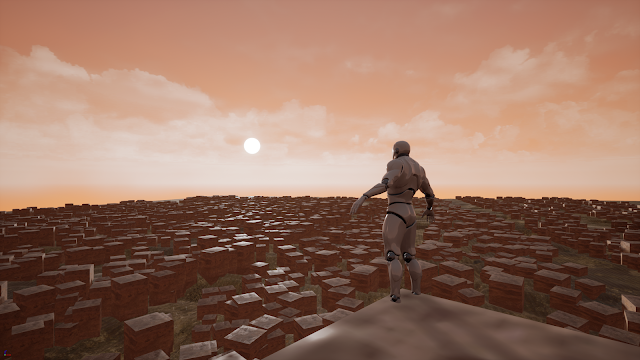
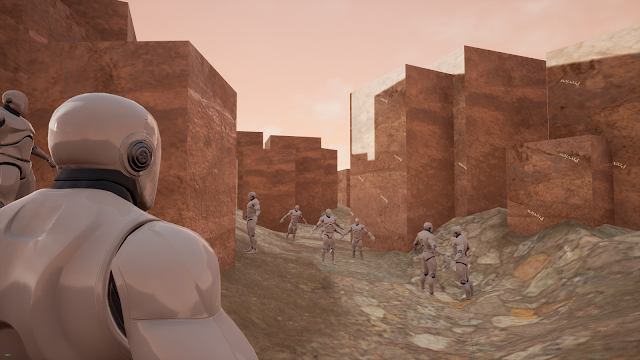
Here are some highresshots from the ingame that I will be using as base images to formulate my concepts. The tools allowed me to really quickly create these in less than an hour. This essentially negates my need for shot exploration in Photoshop. Sketching ideas would normally take me a day or so whereas now I can just fly around my Unreal Scene and make adjustments accordingly.
PART 3: Photoshop painting
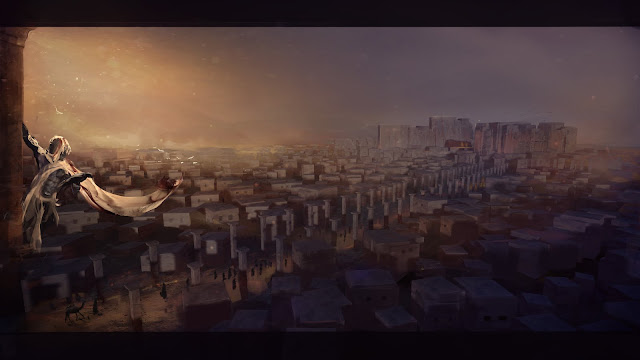
Here are the finalized concepts I created using the images above:
(These were made in a combined time of around 14 hours.
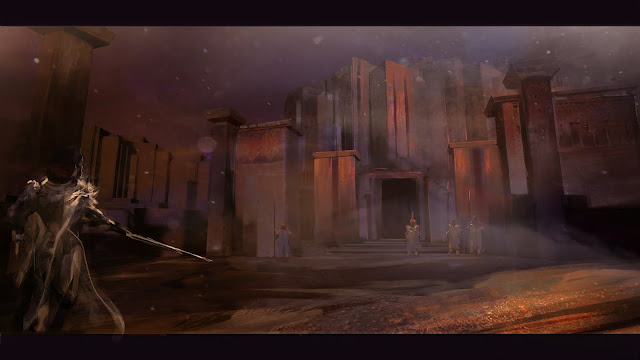
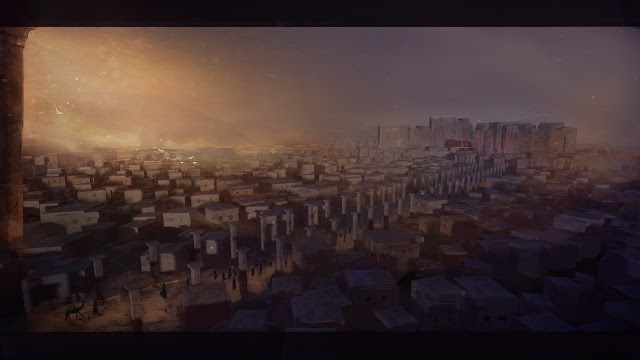
Edit: I went ahead and removed the characters to just focus on the environment design. Was trying to do too many things at once and it conflicted.
His work can be found here: https://www.artstation.com/artwork/8oDJG
I wanted to create my own set of concepts in the style of: Assassin's Creed: Carthage, drawing inspiration from their recent publication, Odyssey.
I also wanted to explore the use of 'tools' that would allow me to quickly mock up a concept in 3D that I could then take into Photoshop and finalize. This is mostly to speed up my workflow and improve the quality of the work that is produced.
I will be spending a little less than a month on this project, with 3 weeks focused on learning/creating some tools while the final week will be used to create the concepts.
Phase 1: Research and Development
Using Houdini, I created a variety of Procedural tools that would allow me as an artist to quickly mock up a level.
My PillarCreator allows me to manipulate geometry to form a Pillar (It can also be adapted to form posts, lamps, and so forth). Using a curve, I can define where the pillars should form and through a resample, I can dictate how many pillars to form between point a and b (This essentially acts as a %).
PillarCreator from Rene Bencik on Vimeo.
Terrain:
This is a simple terrain digital asset that allows me to manipulate how rough/soft the terrain is and allows me some iteration through 'offset'.
This is the first 'sand' material (and general material) I created in Substance designer. The goal of this was to figure out general substance structure and formatting, how the nodes work, how to create certain elements that create a greater whole.

This is a more refined version of my material after doing some more research and learning. I still feel like I would have to commit more time to this to really get more in depth and understand the process better.

I also decided to look more into Quixel Mixer to create a material for the sand since I was not completely confident in my substance designer abilities. The results were much better and much easier to attain as Quixel is more geared towards artists. I plan to buy a license in the winter break and work on learning the program.


I applied the material I created to the landscape I generated from my digital asset. to get a base. Unfortunately, I haven't quite figured out how to get the level of detail I want but it's a good base for now. This is something I would have to explore further over break (I plan to learn Quixel Suite 2.0).
I combined all of the elements inside of Unreal and built up the scene, using the digital assets as seen below:

Part 2: Shots
Here are some highresshots from the ingame that I will be using as base images to formulate my concepts. The tools allowed me to really quickly create these in less than an hour. This essentially negates my need for shot exploration in Photoshop. Sketching ideas would normally take me a day or so whereas now I can just fly around my Unreal Scene and make adjustments accordingly.


PART 3: Photoshop painting
Here are the finalized concepts I created using the images above:
(These were made in a combined time of around 14 hours.


Edit: I went ahead and removed the characters to just focus on the environment design. Was trying to do too many things at once and it conflicted.


Subscribe to:
Comments (Atom)


