Showing posts with label 3D Art. Show all posts

Thursday, April 18, 2019

Bust Texture Pass

Finally got a chance to do a little texturing. Did a pass, skin is super difficult to do correctly...

I did 2 renders in Iray, one focusing on the texturing, and one with the specularity blown up to give it a resin look, as with the reference.

Next up, get it in Engine! Hopefully I'll find some time to spare in the coming few weeks before industry reviews.


Edit: I noticed the glossy render had some artifacting in the neck area due to the rendering. So I went and did a more refined edit. This one combines both into a more finalized approach.

Slimy little Alien boy.


Update: Heads successfully in Engine with minor hitches. Texture's are not working correctly due to incorrect scaling :( My mistake, an oversight, I thought I had the size sorted out in the FBX export but I didn't.


And it's in Engine, fixed with decent detail! Just need to make some lighting/scene changes and maybe some in engine material tweaks to get the full effect!


Monday, March 18, 2019

Bust HighRes

I finally have some time to work on the 3D bust,

Update 1: 3/18

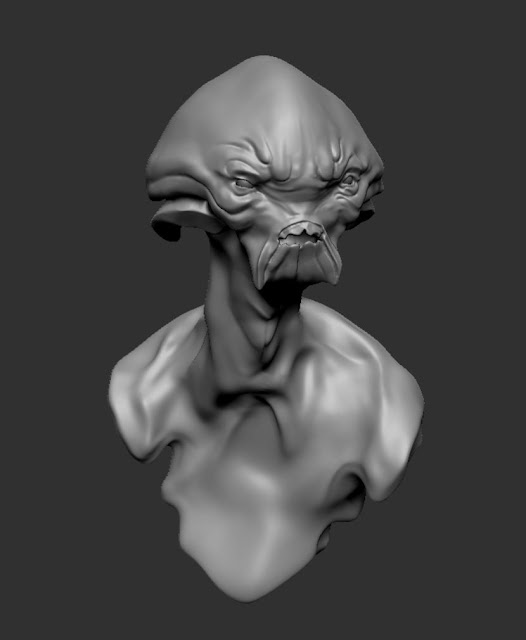
I went ahead and made some changes to the sculpt. Working on slowly pushing and pulling the folds and shapes. Trying to maintain some degree of accuracy but mostly just working from large to small in Dynamesh.


Currently only got one side of the face done. Adding the ear flaps/sculpting the eyes/mouth without symmetry was a pain but manageable.

So I just got to do the right side of the face, the right eye. Then the mouth, followed by the nasal bridge area. This will then lead to the turkey neck. I will also have to re-emphasize the folds, as they are quite loose in the original sculpt.


Update: 3/20

Continuing to build out the sculpt, I am continually making changes to the form because I'm noticing small things that need to be tweaked or edited as I go. I need to inflate the brow a bit and tuck some of the cheek muscles back a bit more towards the ear (which also needs to be pushed back and made smaller). I will most likely move the mouth and brow forward slightly to compensate.

The neck is what I'm currently working on as well as the general body. These will take the least amount of time as most has been and will be invested in the face.


Update 3/21

Cleaned up a lot of the issues that I found earlier and started moving onto sculpting out detail.


3/25
Continued to finalize the High res sculpt, here are a few shots of the sculpt and overall detail. I wasn't able to do the lower body due to time constraint but this is something I could always go back to and keep working in more detail.


3/26

This morning I quickly did the low poly inside of Zbrush, using  polypaint/weights (to create a basic topo) as well as a 'bear-rug' unwrap using UV master. I really only had about an hour to do this because I wanted to get it into Substance and bake it before class.

It's at 25k. I did some tests and managed to get it to around 10k-3k but I was starting to lose too much details even with polyweights.

Here are some renders from inside substance.


-placeholder


Tuesday, February 26, 2019

Bust proxy pass

Here is my sculpt reference by Aris Kolokontes:


And here is my proxy pass:


Monday, October 15, 2018

Week 8 - Cannon to UE4

This is the export from substance painter:


The master material setup:


And the cannon with the material instance and fresnel:

Monday, October 8, 2018

Week 7: Baking and Texturing

LowPoly:


HighPoly:


This is the end result! I am pretty happy with it, even though the cannon looks like it's seen brighter days.


Monday, October 1, 2018

Week 6 - Cannon UV and Decimate

This week we were tasked to UV our cannon and to decimate it in Zbrush after we add in some details.

I remodeled the cannon and completely cleaned up the topo to get under 1k. I unfortunately missed the top opening (I might add that in again).


Once the cannon was complete, I proceeded to UV it.


I tried to keep the UV's organized by component (grouped the cannon parts together, the base etc).

I also made sure I had clean and generally good looking UV's.


I then added the details in Zbrush.


Followed by a decimation from 2m to 140k.


Here are the two cannons in Maya:


BONUS:

I downloaded Quixel Mixer to play with some megascans and create some textures.

I made two metal textures that I am going to import into Substance and paint with.


I assembled the materials in Substance Designer but unfortunately because I have a temp license from Quixel, I lost a lot of the detail while exporting (can only export as jpg or png)


I managed to get these custom materials into Substance and painted a bit. They work!


Monday, September 24, 2018

Week 5 - Model a Cannon

For week 5 we are modelling a cannon for unreal.

I took the concept into Maya as an image plane and used the UE4 Character as ref for scale.


I followed the concept for the most part.


Here is the final Cannon.


And here it is in Unreal. I had to go back and make some changes to the cannon, since some of the faces weren't showing correctly.


Saturday, September 15, 2018

Week4 - Lego Project continued

I cleaned up my arch from last week with help from Alex and made some more variations.


Here are all the variants:


After creating these, I was tasked with building the wall section. I started by creating a kit in Maya, collecting and altering some pieces. I will be building the entire wall section in Maya. Then grouping all the pieces and exporting as an FBX.


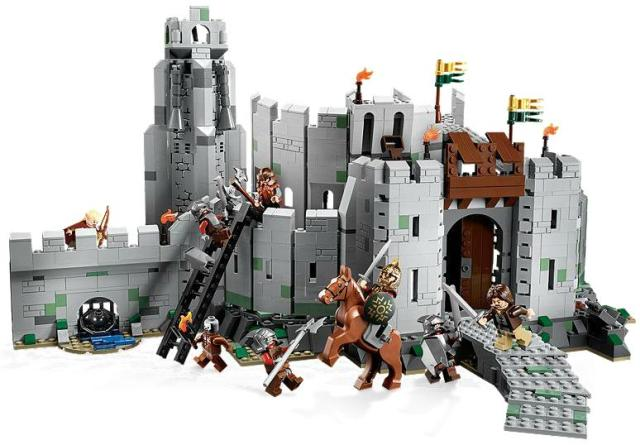
Here is the final wall created in Maya through the kit. It is a 90% accurate replica of the leftmost wall found on this model:


Here it is in Unreal Engine, through the use of a Blueprint (Each piece is still individual but they are grouped as one and as a result can be textured individually in engine). This also allows for resizing should scale change.


Following this, I went back into Maya to clean up the 'scene' a little by removing some polys from pieces that aren't fully visible in the wall (The cylindrical pegs are around 280poly each).

Tris count for the entire scene before clean: 191k


Tris count after: 126k. No visible difference between the two and there is no point in having the Lego brick pegs showing on pieces that are going to be stacked and static.


Because the wall scene is so big, I created a custom LOD for the majority of the wall. This removed around 60k tris.


The only issue is that I would not be able to preserve some of the detail. So I would need to bake the high poly onto the low. But that is something for another day. Another issue is setting up the LOD using blueprints in Unreal.

So the idea is that the LOD would be for the entire scene rather than each individual piece. I have yet to get it to work.